Stay Comfortable: A DIY Guide to HVAC Symptom Self-Check
Introduction
As the seasons change, our reliance on heating, ventilation, and air conditioning (HVAC) systems becomes increasingly crucial for maintaining a comfortable living environment. However, there's nothing more frustrating than discovering an issue with your HVAC system when you least expect it. Before reaching for the phone to call a technician, wouldn't it be great to have a basic understanding of what might be causing the problem?
In this blog post, we'll empower you with the knowledge to perform a DIY HVAC symptom self-check. From unusual noises to inconsistent temperature control, we'll guide you through common symptoms that might indicate a problem with your HVAC system. By taking a proactive approach to identifying issues early on, you can potentially save time and money while ensuring your home remains a haven of comfort throughout the year.
So, whether you're a seasoned homeowner or a first-time renter, join us as we delve into the world of HVAC troubleshooting. Get ready to discover the basics of HVAC systems, learn how to recognize common symptoms, and gain the confidence to address minor issues on your own. Let's embark on a journey to keep your indoor climate just the way you like it – perfectly comfortable.
Here are some things you can check.
Is There Power to the Unit?

Check the fuse or breaker box. Make sure they don't need to be replaced or reset.
Remember, if your electrical power is out or disconnected, your system won't work unless you have a backup power source like a generator.
What Are Your Thermostat Settings?
Is the screen on your thermostat blank? Try changing the batteries. If that doesn't work, you probably need to give us a call.
Is the thermostat set to cool or heat mode and not “off”?
Make sure it's set to the right temperature setting
No Heat / Insufficient Heat
If you've had major repairs to your home recently? Check to see if gas or electricity has been turned off. Turning it back on may solve the problem.
Check your thermostat. Is it set to heat? What temperature is it set for? If your thermostat is turned off or set incorrectly, turn on and/or reset the thermostat.
Check the circuit and fuse box. If you have an open breaker or blown fuse, switch on the circuit or replace the fuse.
No Cooling / Insufficient Cooling
Check the doors and windows in your home. Close any open doors or windows as heat and humidity may be getting in through them.
Check your thermostat. Is it set to cool? What temperature is it set for? If your thermostat is turned off or set incorrectly, turn on and/or reset the thermostat.
Check the circuit and fuse box. If you have an open breaker or blown fuse, switch on the circuit or replace the fuse.
Check the air conditioner condenser (outdoor unit). If there are leaves, hedges, children's toys, etc closely surrounding or sitting on top of it, the unit's capacity will be significantly reduced. Make sure your outdoor unit has 1′ of clearance all around it.
No Airflow
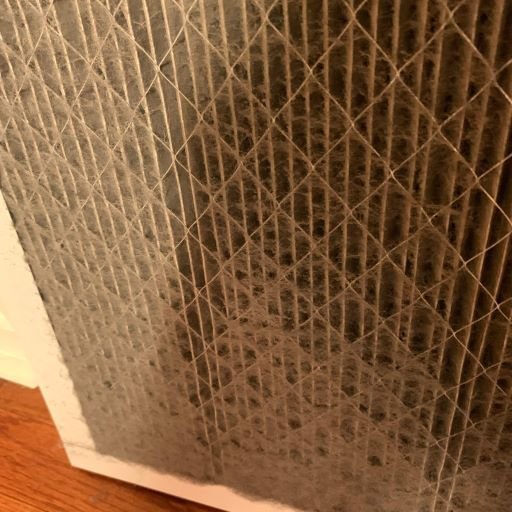
Dirty Air Filter
Check the filters in each of your system components (where applicable). If any of your filters are dirty, consult your manual to clean or replace them.
Check to see if there is any cooled or heated air coming through your vent. Your air conditioning indoor blower may not be operating.
Stale and Stuffy Air
If you have a whole-home air cleaner or air exchanger, make sure it is switched on and its filter is clean.
Too Dry or Too Much Moisture in the Air
Check to make sure your humidifier is switched on. Many times, homeowners turn off the humidifier at the end of the previous heating season and forget to turn it back on when needed.
Make sure your humidifier's damper or water valve is open. If it's closed, consult your manual to open or unclog it.
Check your humidifier settings and adjust the indoor relative humidity settings to bring greater comfort to your home.
Noisy Air Vents
A high-pitched or whistling sound often, although not always, indicates a lack of return air. Make sure your return and supply vents are open and free of any blockages including furniture.
Other noises (e.g., rattling, humming, thumping, or scraping sounds) could be a sign of undersized or flimsy duct work, clogged filter, or wear and tear on your AC system's internal components. If you hear an unusual sound, give us a call.
SPECIFIC ITEMS TO CHECK
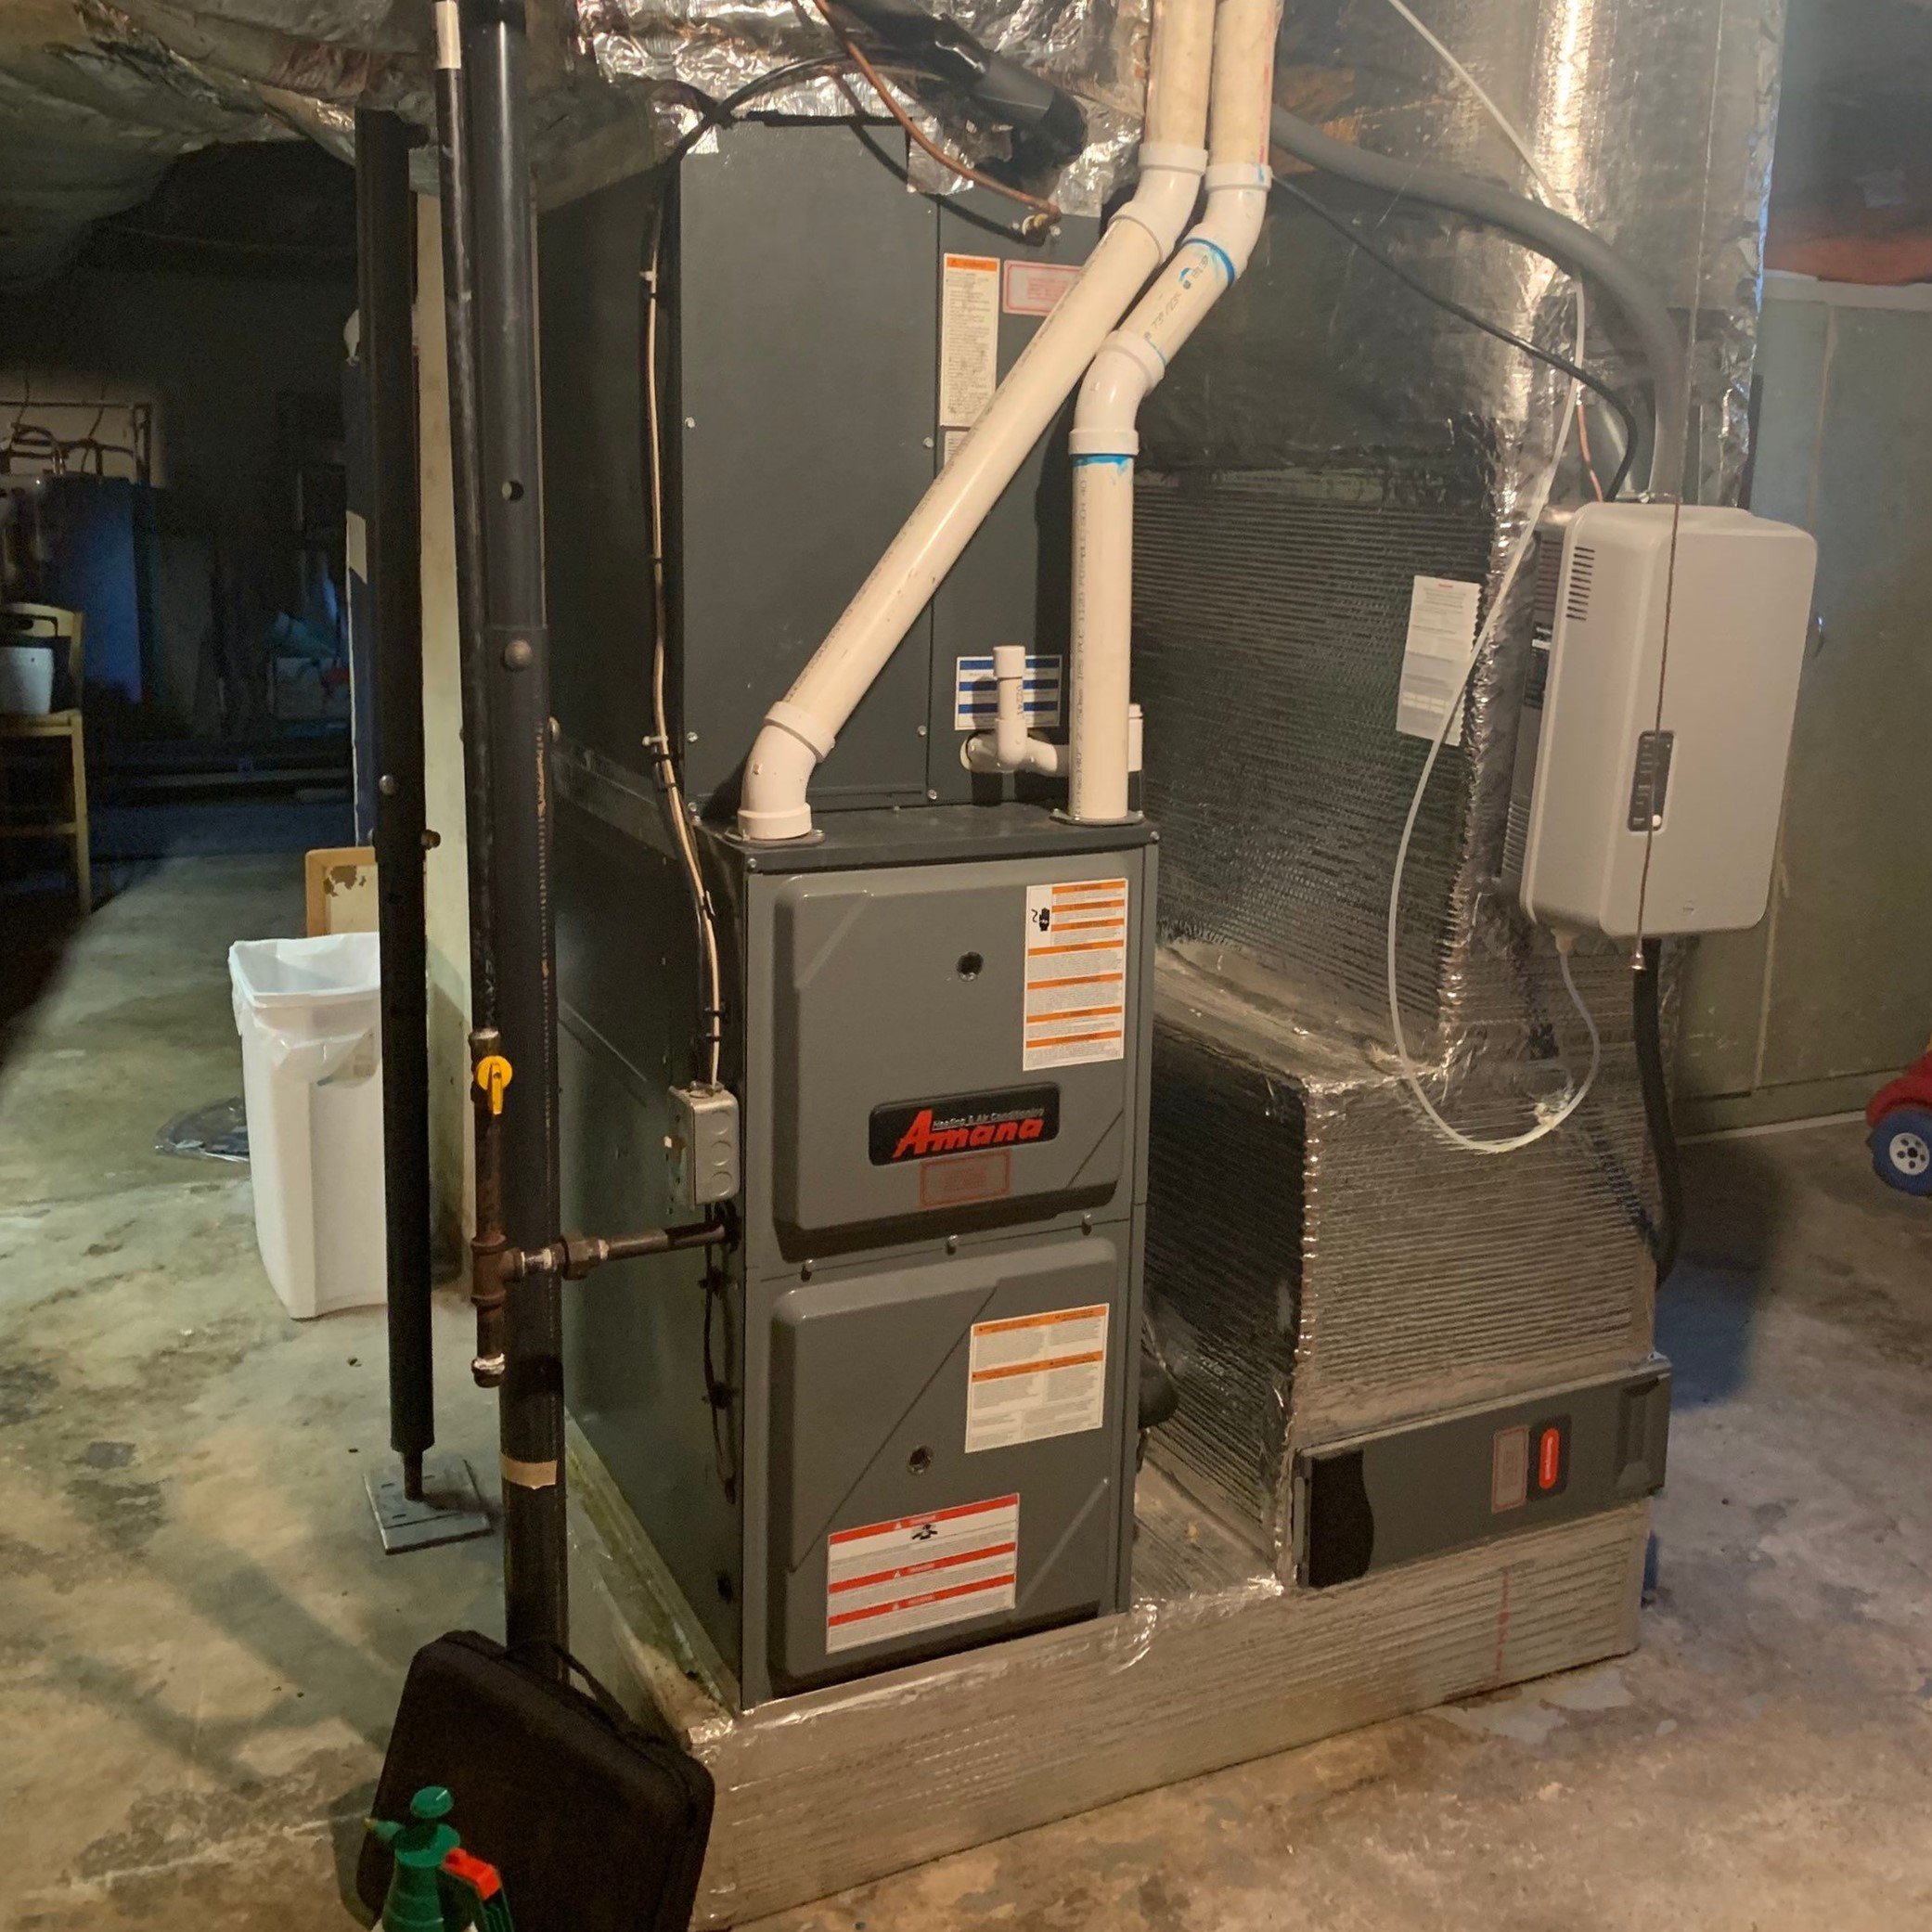
Heating
We all know that furnaces can sometimes break down or stop working properly. But before calling an HVAC technician, check out our basic troubleshooting guide. You may be able to take care of common furnace issues yourself and save money on a service call.
Heating system symptom checker
Thermostat Anytime you have furnace problems, your first step should be to check the thermostat. Ensure it is set higher than room temperature and set at “heat.” Turn the fan switch on. If the fan doesn't turn on, it's possible the furnace isn't getting power or the motor is broken.
Filter A dirty filter can cause your furnace to stop working. How often you change your filter will depend on your furnace, the type of filter, and your lifestyle. To change your filter, remove the old, dirty filter and replace it with a new one. Wait 30 minutes before restarting your furnace or heat pump. Ensure that your furnace door is on properly after changing the filter as this can prevent the furnace from starting.
Is the furnace on? Double-check that your furnace is turned on. Start by checking the breaker in your electrical panel. If the breaker was tripped, check for loose connections before turning it back on. Also, make sure that the furnace switch is turned on. The switch is usually located near the furnace and looks like a light switch.
Look for blockage If you've checked all of the above, see if any debris – snow, ice, weeds, or grass – is blocking your furnace venting.
Blower fan Not all furnaces have a power button for the blower fan, but if yours does, check to make sure it's on.
Gas on? Check to see if the gas is turned on at the meter. If not, contact your utility company before turning it on.
Cooling
Your A/C unit's compressor is responsible for cooling the refrigerant that cools the air in your home. It's a vital part of your system, so you must be able to identify A/C compressor symptoms and take care of issues before they turn into costly repairs.
The air compressor is found on the outside portion of the system—within the large condensing unit. A/C compressors act as the mechanical pump that is responsible for circulating and compressing the refrigerant so that your family stays cool on even the hottest of days. Because it stays outdoors, it can also be outside our frame of mind when things go wrong. However, if you're experiencing the following four air conditioning symptoms, there may be something going on with your A/C compressor:
Not running – If you can hear your compressor click or hum but it isn't doing anything, it could be an electrical issue or a problem with the compressor. It's best to give us a call if this is the case.
Excessively hot – The compressor is the high voltage, high amperage portion of your unit. When malfunctioning, they've been known to smoke, melt wires, and even catch fire. You should immediately call 911 if you see a fire. If it is just hot, open the circuit breaker and give us a call.
Tripped circuit
Noisy machine – While most A/C units outdoors make a degree of noise while it's cooling your home, the noise coming from your unit seems to be a bit excessive. Also, you're hearing noises you've never heard your system make before.
Air Flow
Poor airflow is the number one heating and air problem. Improper airflow is a result of any number of issues including:
Undersized unit
Improperly installed unit
Poorly designed and/or installed ductwork
Blower fan malfunction
Furniture or debris blocking ducts or returns
Dirty blower fan or ductwork
Dirty filters
However, there are plenty of HVAC air handler troubleshooting you can do without calling an HVAC technician.
Perform air handler troubleshooting by checking these components:
Ductwork – Try to determine if holes or barriers are preventing adequate air from moving freely within the ductwork. If some rooms seem to heat or cool more readily than others, it may be a sign that previous work had been done on the ducts and air is escaping. Holes or seams should be sealed with duct tape, and barriers in the ductwork should be removed.
Air Filter – Be sure to check the air filter and replace it if necessary. A dirty air filter can cause your HVAC system to go into overdrive and result in costly energy bills.
Registers – Check to make sure registers are open and not covered.
Indoor Air Quality
We all like our homes to be clean and clutter-free. But what about the air we breathe inside of our homes? We want that to be clean, too. Indoor air can be 5 times as contaminated with toxins, including dust mites, pollen, mold, and other unwanted air pollutants, as the air outdoors. Indoor air quality is now one of the EPA's top five environmental risks to public health, it's more important than ever before to ensure the air we breathe indoors and outdoors is safe and healthy.
How You Can Improve Indoor Air Quality

There are plenty of ways to improve indoor air quality. Per the EPA, the top 3 strategies to reduce indoor air pollutants are Remove the Source, Improve Ventilation, and Air Cleaners. Below are a few suggestions to get you thinking about how to improve air quality in your home:
Remove the source – This is typically the most difficult. Some of the most significant sources of indoor air pollutants are indoor cooking, building materials, furniture, paint, and cleaning solutions. These are hard to simply get rid of but there are several things you can do to remove the source. Frequent cleaning and dusting, use strong chemicals outdoors, use your exhaust fan above your stove when cooking, change air filters regularly, and take care of water leaks as soon as possible.
Increased ventilation – Opening up the windows is a great first step in improving the air quality of your home. During the winter, we often keep all of our windows closed for months on end, but it's important to remember that while it is cold outside, it's also important to get the air in our homes circulating. Consider opening up your windows for a couple of minutes a few times a week—while it may drop the temperature in your house, the fresh air will do wonders for the quality of the air in your home. A more energy-efficient way to get fresh air into the home is to install a whole-home air ventilator. Ventilators work with your HVAC system and can save energy by retaining the heat of stale air before it is moved out of the house.
Air cleaning – Whether it's common air pollutants, seasonal allergies, or dander from our furry friends, air cleaners can dramatically improve the quality of the air in our homes.
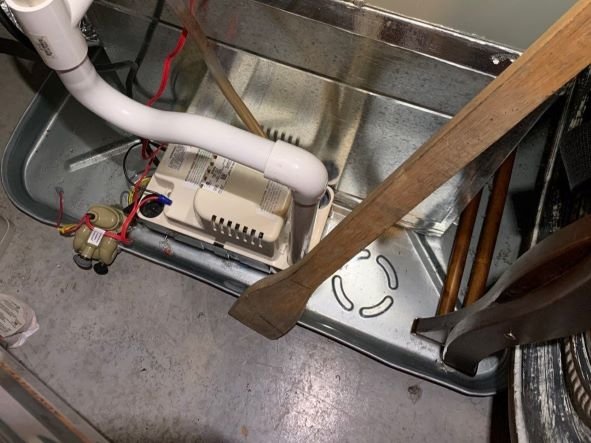
Humidity
A whole-home humidifier is a necessary add-on component for anyone living in a dry climate—especially during the winter months. Too little moisture in the air can cause dry skin, frequent “shocks” static cling, and respiratory problems. It can also take a toll on your home; dry air is not good for antique furniture, houseplants, or wood floors. However, if you already have a whole-home humidifier and you're still experiencing discomfort, your system may not be working properly.
What to do when your whole house humidifier is not working
Repairs should always be left to professionals, but there are a few things you can do at home to troubleshoot possible problems with your humidifier. If your whole house humidifier is not working as well as it should be, follow these easy steps:
Turn off the power and water supply.
Loosen the nuts or remove clips on the cover, then remove.
Remove the drum and check the foam pad for mineral buildup from the water being used in your humidifier. If the pad feels hard, either clean or replace the pad.
Turn on the water supply again.
Allow the reservoir to fill and then reassemble the cover.
Turn the power supply back on.
After you have performed this maintenance, wait about one hour, check the water supply again, and adjust accordingly.
Noises & Smells
Sometimes unpleasant smells and noises coming from an HVAC unit can indicate a problem with the system that could require maintenance or repair. If you're experiencing air conditioner noise or if your air conditioner smells a bit funny, there may be an issue inside your system. Components that could experience these problems include:
Compressor – While compressors are noisy by nature if your compressor is making loud or unusual noises, it may be worn out.
Drive Shaft or Fan Blower Motor – If the drive motor is making loud noises, it may need some lubrication. All motors need to be lubricated at all times, otherwise, they will wear out. Loud noises may be in either situation.
Fan Blade – If one of the fan blades breaks off, it can start rubbing against the house and cause unwanted noise.
If the air from your system smells musty, it may be due to mold and/or mildew build-up in your duct system. One way to get rid of this is to change the filter and clean the drip pan in your HVAC system. Clean using bleach or white vinegar to make sure the area is no longer hospitable to mold growth.
Common furnace noises and their causes
There are several furnace noises listed below, some of which could indicate a problem with the unit. If you're concerned about furnace noise contact a service technician to schedule an HVAC check-up:
Screech – This could be a problem with your motor or fan belt.
Chirp – Chirping sounds are fairly common with furnaces and usually the natural noise of the mechanisms.
Rattle – Rattling noises typically happen when the system is cooling down and are not usually cause for alarm.
Boom – When the weather outside warms up or cools down, the ductwork in your house expands and contracts. If this happens and your furnace smells like it's burning, you might have a dirty burner in your furnace or a defective gas valve.
Ping – This sound can also be caused by contracting and expanding ducts.
Hum – When the furnace burner lights, it may cause a humming sound.
Whine – Whining or odd vibrating noise may indicate a problem with your furnace.
Crackle
Clunk – Clunking or bumping sounds often mean you have a cracked belt.
The best way to determine whether your furnace is making an odd sound is to learn what it sounds like during normal operation and note any changes in the type or volume of sound as the unit ages.
Conclusion
In conclusion, performing a symptom self-check for your HVAC system is a proactive and cost-effective way to ensure the comfort and efficiency of your home or office. By regularly assessing and addressing common issues such as strange noises, uneven heating or cooling, and increased energy bills, you can potentially identify and resolve problems before they escalate into major repairs.
Remember, your HVAC system plays a crucial role in maintaining a comfortable indoor environment and neglecting its well-being can lead to inconvenient breakdowns and higher energy costs. The symptom self-check outlined in this blog post empowers you to take a hands-on approach to the health of your HVAC system, promoting a longer lifespan and optimal performance.
By staying vigilant and addressing issues promptly, you not only save money on potential repair costs but also contribute to a more sustainable and energy-efficient living space. Regular maintenance and attention to HVAC symptoms can make a significant difference in the overall functionality and longevity of your system, ensuring that you and your loved ones can enjoy a consistently comfortable environment throughout the seasons. So, embrace the habit of periodic self-checks, and breathe easy knowing that your HVAC system is in good shape, providing the comfort and reliability you deserve.